
Few months ago, I had invited some of my friends for dinner at home. Like always, they insisted on having a potluck so that I don’t have to cook so much. One friend said she will bring rava khichdi. The name itself brought back so many memories. I could almost taste it. She didn’t know I was looking forward to it and she brought something else that day. Usually I don’t say anything, but that day I shamelessly told her I was really looking forward to eating rava khichdi and she needs to make it for me. Poor girl, she felt so guilty, she made a huge batch of rava khichdi and mint chutney next day and brought it to my home!. Oh it was so good, just like I wanted. I ate that for 3 days(yes, she had brought a lot!) and the best part was even V and Ishaan loved it. Ever since then, I have prepared this couple of times and every time I fall in love with it a little more. I feel it is a fancy name to a vegetable upma , but it is so much more flavorful especially when served with chutney.
Ingredients: 1 and 1/2 cups rava/sooji 1/2 cup onion 1 and 1/2 cup vegetables – green beans, capsicum (bellpepper), green peas, carrot 1 tea spn chana dal 1 tea spn mustard seeds 1 tea spn urad dal 3 green chillies 1 tbl spn chopped(or grated) ginger 1 tbl spn lemon juice (optional) 4-5 curry leaves A pinch turmeric Oil Salt
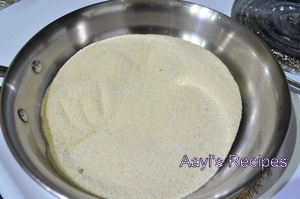


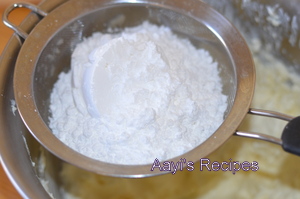
Method: Dry roast rava till a nice aroma comes out and keep it aside. Heat oil (use a little more oil than you would normally add for upma) and add chana dal, urad dal, mustard seeds. When mustard starts popping, add curry leaves, ginger, green chillies. Fry for a minute and then add onions, turmeric. When they turn translucent, add all the vegetables and mix everything well. Fry for a minute, add about 1/2 cup water and cover the lid, let the vegetables cook. When they are almost half done, add rava, about 2 cups water, salt. If needed add more water. When all the water is absorbed and rava is cooked, sprinkle lemon juice and mix everything well. Serve hot with mint chutney.
Mint Chutney : Grind together A big bunch(about 1 cup) of coriander leaves along with stems 1/4 cup mint leaves 2 green chillies 1 tea spn cumin seeds 1 tbl spn lemon juice 1 garlic clove 3-4 curry leaves (optional) 1 tbl spn fresh/frozen coconut Salt
Serves : 3-4 Preparation time : 30mins
Last one week had been one of the busiest weeks of 2014 so far. Our little Ishaan is going to be 4 year old very soon. It feels so unreal!. It feels like yesterday I had posted about his birth! Our life has completely changed in these years. He has turned from a tiny infant to cranky toddler to a smart and very passionate boy that he is today. We feel so blessed to have him as part of our lives.

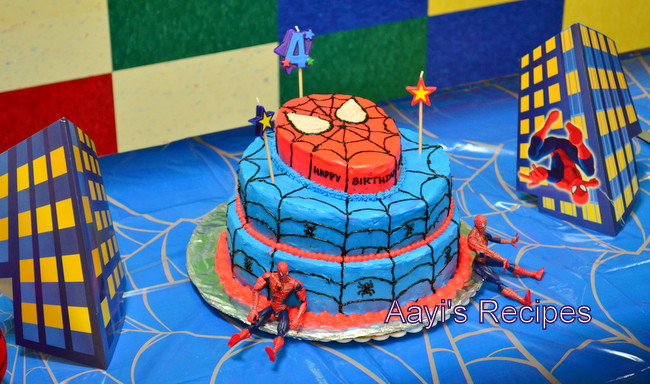
This birthday has been very special to us. Probably this is the very first birthday when he understood a lot about birthday parties. I love birthday parties, especially little kids birthdays when it is a magical day for them and they feel so special. Ishaan started going to preschool last July. Few months after he joined the school, he attended many of his friends parties. That is when he started asking when will be his birthday. He was frustrated it was not coming soon enough!. In December, he started saying, “I have waited so long! how much more do I have to wait”. Sometimes he would ask every single day. By then, he had decided where he wants the party, what theme it would be and what kind of cake he wants.

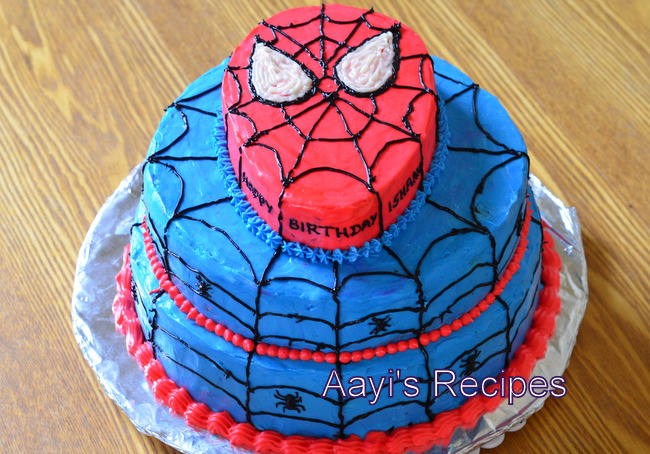
This was by far the biggest party we have arranged. A total of 60 people (including 24 kids) attended the party. We had to leave out some of our friends because we knew the venue could not hold more than that!. V thought we should order the cake from outside since it would be a lot of work to bake a big cake. But I had other plans. I had planned for this cake from last few months. I had shown different pictures of Spiderman cake to Ishaan and chosen one which he had liked, that would be easy to decorate. I knew the Spring break for the kid started this week and he would be home and that meant I would get little chunks of time to work on it. So I wanted something simple.

Although I initially wanted to choose a different cake, I finally chose my trusted chocolate cake recipe . I have prepared cakes with this recipe many times and every time the outcome was fantastic. So I did not look further. I wanted a different kind of icing though. I wanted to cut down the sweetness from the icing, but I still wanted the sturdiness of buttercream icing which makes it easier to give smooth finishing to the cake. So after a lot of researching, I decided to use cream cheese in the icing. I did not want to use whipped cream in the outer icing because I did not have a very good experience with it when I used it in jungle cake where it started melting down after a while. Cream cheese has a little salt in it which helps in cutting down the sweetness. Although I used a lot of sugar, it was not overpowering. The icing held up beautifully even after I kept it out at room temperature to smooth it out (It was not still completely smooth even after all that, but I thought it was ok). Around last month, I baked a small trial cake to make sure the chocolate frosting and cream cheese icing went well with the cake. I was totally happy with the taste and now I had to worry only about the look.

Did I say the cake was a superhit at the party? It was gone in minutes.People wanted more helpings of the cake but nothing was left. I was surprised when I saw that not even crumbs were left!. V declared it was the tastiest birthday cake I have ever baked. The child was very happy with how it looked and tasted. We kept few of his spiderman toys around the cake for that extra spidy effect.

I tripled all the measurements given in the chocolate cake recipe . Refrigerated the cake till it was completely cooled down. Every tier was then cut horizontally and brushed with sugar syrup from all sides and spread with a thick layer of chocolate icing (like a sandwich with two layers of cake with a layer of chocolate icing in between). Then a crumb coating of cream cheese icing was applied to each tier and refrigerated till the icing settled. Next day it was decorated.
Sugar Syrup: Mix about 1/4 cup water and 2 tbl spn confectioners sugar and microwave for few seconds. Mix a little vanilla extract. I had to make this syrup few times to get enough to brush entire cake.
Chocolate Icing : 8 oz cream cheese at room temperature 4 tbl spn confectioners sugar 1 cup(1/2 pint) whipping cream 1 cup semisweet chocolate chips 1 tbl spn vanilla extract 1 tbl spn cocoa powder


Heat 1/2 cup whipping cream with chocolate chips. Mix till they melt. Keep aside till it cools down. Add vanilla extract, cocoa powder and mix. Make sure cream cheese is at room temperature. Beat it with sugar till it is smooth. Now add remaining 1/2 cup whipping cream and beat it. Pour chocolate mixture in it, a little at a time beating all the time. Beat till peaks form.
Cream cheese frosting : 16oz cream cheese at room temperature 12 tbl spn (1 and 1/2 cups) butter at room temperature 1 tbl spn vanilla extract 6 tbl spn whole milk 3 cups confectioners sugar

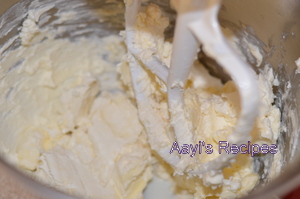

Beat butter and cream cheese till they are well mixed. Now add the sugar (I sieve sugar to make sure there are no lumps) Add all the remaining ingredients and beat till soft peaks form. Make sure cream cheese and butter are at room temperature. If not, small pieces of butter/cheese remain in the icing. I had lot of trouble with these since I tried to rush. I used the icing in that consistency for crumb coating. After that I added about a cup more of sugar to it so that it was not so runny.
Storing and Transporting a tiered cake: I own a plastic Wilton cake carrier that I bought many years ago. I use it very extensively and I love it. But the problem is, it is not tall enough to hold 3 tiered cakes. I could use it before I applied the icing. Once the decorations were done, I realized the cake would not fit in that carrier. I don’t like refrigerating the cake without cover. V searched all major craft stores for paper carrier boxes but nothing was available that would hold the cake. So he got a cardboard box.

I cut open the top of the box with a sharp knife. Then, I covered the entire inside of the box with aluminum foil. I did not want the cake to touch the sides in case it slid when we were carrying it. It was perfect size(luckily) to fit the cake. Then I covered the top with plastic wrap. It fit into my fridge perfectly and we could carry the cake without any concerns.
