
I have been requesting my brother to post some recipes here for last 8 years. He is a complete foodie – who loves to eat, loves to cook. Finally he agreed and here is his first post here. This is also the 1000th post on this blog (yayy!!!). Now over to my brother Naveen . – Shilpa
To give a brief but much deserved break, from several years of relentless work of Shilpa, I decided to contribute to this site with few and really few recipes, she has missed so far. As I am her brother, all her relatives by birth, whom she owes credits of learning so many wonderful recipes, remain my mentors as well.
I tasted this Misal Pav first, at my Pachi’s house in Balgaum several years back. Apart from its appealing way of serving on dining table, it redefined my understanding of usage of left hand. At my house, left hand is never used while having food and that is what we were taught. Misal pav is first dish that I saw everyone using left hand, for holding Pav in left hand(Pav also means foot but here I mean bread Pav).
Right hand is used for spoon, either for having Misal or for helping with farsaan(a namkin), coriander leaves or chopped onions. This fiery Kolhapuri recipe is at its majestic best when gravy is spicy and hot.
Though this dish is very traditional and a regular one at breakfast, recipe presented here is not in its most authentic version. Nevertheless, its a shortcut to that perennial bliss called fiery Misal Pav.
Apparently Pachi has learnt this from one of her friends from Kolhapur. Apart from her house, I have also tasted this dish at few restaurants in Belgaum, Opal restaurant of Kolhapur and Rajvardhan foods in JP Nagar of Bangalore. If you have never tasted this, dare to taste this, only with few glasses of water readily available. Believe me, you will cherish this taste and its associated style for a long time.
Ingredients: 8 pairs of pav buns Butter to roast Pav 1.5 cup Matki(Moth beans) 2 Potatoes 2 Tomatoes 3 tbsp Chilli powder Salt
For masala: 1/2 Coconut (approx 1 cup) grated 3 tbsp coriander seeds 1 tbsp cumin seeds(jeera) 6 cloves 1 star anise (badam phool) 1 inch cinnamon (dalchinni) 1 tbsp white sesame seeds (til)
For seasoning 2 tsp mustard seeds Pinch of hing(asafoetida) 1 tsp chili powder 10 cloves of garlic
For serving One large onion finely chopped 1 cup farsaan(mixture or namkin) 1/4 cup chopped Coriander leaves 1 Lemon cut into small wedges
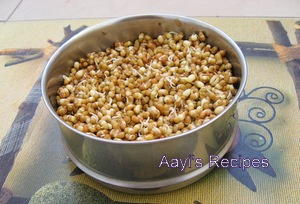
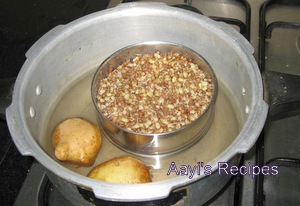
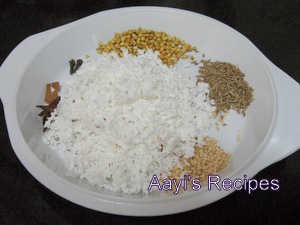
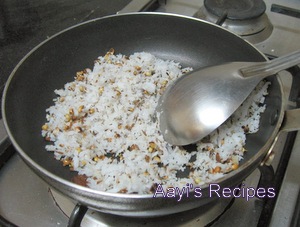
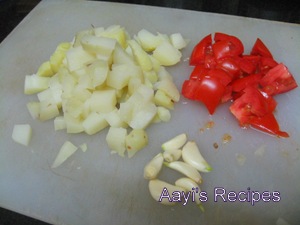
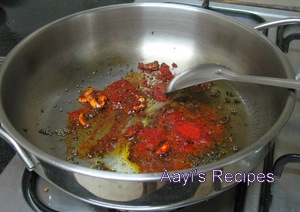
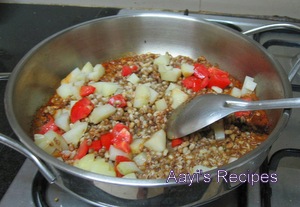
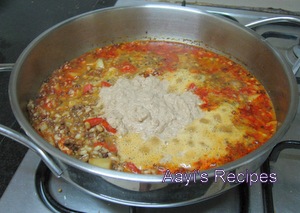
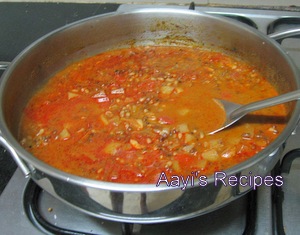
Method: Wash matki till you get clear water, soak and keep it overnight. Next day drain the water and leave it moist for another half day to get sprouts. Pressure cook matki and potatoes for one whistle. Fry coconut and other ingredients for masala, grind them in to paste. In a pan, heat 2 table spoon of oil. Add mustard seeds and once they start spluttering add pinch of hing. Then add crushed garlic. Fry garlic till it turns brown and then add chili powder. Ensure that none of the ingredients get burnt. Then add chopped tomatoes and fry. Add parboiled matki along with its boiled water and chopped cooked potatoes. Mix coconut masala and stir well. Add salt and cook for around 10 minutes on low flame. Pour sufficient water and bring it to boil. If you do not see red color on top, prepare for separate seasoning. Heat a table spoon of oil and add a spoonful of chili powder. Pour this over curry to get fiery authentic look. If you are health conscious use very minimal quantity of oil while preparing dish however garnish with oil seasoning towards end to get that appearance of ‘ kat ‘. Serve with pav, coriander leaves, farsaan and onions.
Serves : 4-5 Preparation time : 45
PS: As mentioned earlier, this is authentic dish but recipe is not authentic. Here traditional goda masala or garam masala is not used. Ingredients for garam masala are used in least possible quantity. Also in traditional version, Usal and Kat are prepared separately and mixed only just before serving. However if your focus is on end result, you have same Misal pav with this recipe and irresistible dish in much shorter time.

My love for the popular Maharashtrian dish Thalipeeth started in Belgaum. They are healthy, very delicious and the best part is, they are easy to make. As much as I love the thick bhakris and thalipeeths, V is not such a big fan. I have been trying to make different types of these bhakris/thalipeeths lately in the hope that he will start liking them some day. That would also give me loads of easy options for breakfast.
One of my favorite ingredients to experiment with is vermicelli. Somehow I keep reaching to the vermicelli jar. I make simple upma , vegetable upma , idlis etc with it. Recently I tried this thalipeeth with vermicelli and it turned out delicious. The best part for me was, the child loved it.
Here is a thalipeeth recipe that I used to make frequently. Check out Nupur’s thalipeeth recipe.
Ingredients: 3/4 cup vermicelli 3/4 cup sooji/rava 1/2 cup rice flour 1/2 cup wheat flour 1/2 cup chopped onion 2 tbl spn chopped coriander leaves 1/4 cup fresh/frozen coconut 1 tea spn chili powder 1 tea spn cumin seeds 1/4 cup yogurt Oil/Ghee Salt


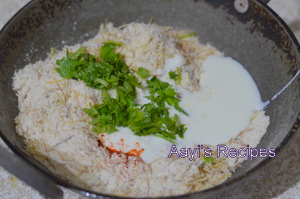
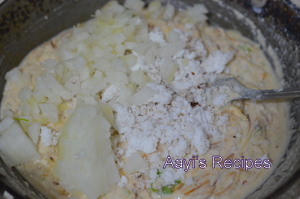
Method: Heat a little oil and fry vermicelli, sooji till they slightly turn brownish. Keep them aside till the mixture cools down to room temperature. Add rice flour, wheat flour, onion, coriander leaves, coconut, cumin seeds, yogurt, salt, chili powder to the vermicelli mixture. Pour in a little water to make a thick mixture.


Heat a tava and spread some oil/ghee on it. Then with your fingers, spread a thick thalipeeth on the tava. Close a lid and let it cook. Then turn it upside down and spread little more oil/ghee near the sides (optional, this makes it crispy). Serve hot.
Serves : 2-3 Preparation time : 30 mins
