
Everyone has their own list of comfort foods, which when savored, makes you very happy and fulfilled. When I think of comfort food, the first thing that comes to my mind is a dali ambat – which is a traditional Konkani dish with toor dal , coconut and a vegetable. Its just out of the world. Any one of a huge list of vegetables can be used for this gravy and depending on which vegetable is used, the gravy gets its unique taste. Recently aayi introduced me to a whole new dali ambat with pepper( miryakan ), instead of the traditional fried coriander seeds in it. Pepper gives a very good aroma as well as taste to it. She made this with frozen suran and it was just superb.
Last month, we had been to Boston to one of my cousin’s place. My cousin asked aayi to make dali ambat with suran . Aayi used more of dal and very less coconut and made this gravy. Not only we all coconut fans, but her husband(who never eats any coconut based gravies), simply loved the taste of it. Somehow I could not recall tasting this version before, so I kept on troubling aayi saying she does not give me all her recipes :)). She made this again last week and I am sure this will be a regular at my home now.
Those who do not like coconut can decrease the amount of coconut and increase the dal to get required consistency, you won’t get a a strong coconut flavor, but coconut is a must for this.
Ingredients: 3/4 cup toor dal 3/4 cup yam ( suran ) or ivy gourd( tendli ) or potatoes 1/2 cup fresh/frozen coconut 1/2 tea spn peppercorns 2 red chilies 1/4 tea spn tamarind extract or 1 piece of tamarind 1/2 tea spn mustard seeds 4-5 curry leaves A pinch asafoetida A pinch turmeric Oil and ghee Salt
Method: Cook toor dal with a pinch of turmeric in cooker. Cook suran pieces. If using a cooker, keep the dal in bottom vessel and suran pieces in topmost vessel with a very little water. Be extra careful while using frozen suran , it cooks very fast. Grind together coconut, tamarind, peppercorns, red chilies to a paste. Heat together cooked dal , suran , coconut paste and salt with enough water to get it to a thick gravy consistency. Cook for about 5-6mins. Take off the heat. In a separate pan, heat a little ghee and add mustard seeds. When they start popping, add curry leaves and pinch of asafoetida. Pour this seasoning over the gravy and close the lid. Serve hot with rice.
Serves: 3-4 Preparation time : 15mins
I can’t remember when was the last time I participated in any blogging event. This withdrawal was not intentional, I was just trying to balance between my home, office and some bad surprises of life. But now that aayi is here, I thought of participating atleast in one event which looked very interesting to me. It’s Anita’s puri party :).
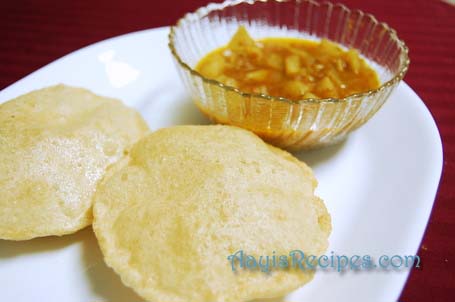
Puri is a kind of Indian bread made with wheat flour and then deep fried. The size of these beautiful and tasty treats vary from place to place. At my place we make puris of a big bangle size, but my friend from Andhra used to make it 1 and 1/2 times bigger than the one I make. Recently our friend’s mom from Karachi, made puri – chane combo for us, her puris were of our chapathi size. Whatever size and shape it might have, these are real treats.
While growing up, my brother and I used to fight for puffed puris . Somehow, I always loved the ‘happy little puffed puris ‘(At least few of you know I am Bob Ross fan , so this is side effect). I loved to poke those puffed ones with finger and enjoyed the hot air that escapes from them. It was and is a treat for me. My brother sometimes presses the puris on a paper towel to remove oil from them and I feel sad about such puris :).
Usually puris are made for breakfast at my home. We like to eat this with any one of potato bhaji with coconut ( batate pattal bhaji ) , potato-garlic bhaji , green peas kurma , amras etc. I have tasted it with many other combinations and have started like to many of them, but these are the ones I grew up eating.
I had posted few tips about “ How to make soft and puffed puris “. Current post is what my aayi has followed. She passed on these tips to me which she has learnt from experience of 30+ years. When we made these today, there was not even one sad puri in the whole lot, my hubby said they looked like balls since they had come out perfect rounds :).
Everyone knows how to make puris . So I will concentrate on how to make them perfect. These are not instructions but tips to make them perfect(This tutorial is mainly for beginners. Those who are experts in puri making, please ignore) . Most of you know these already, but this is a kind of summary.
Puri tutorial:
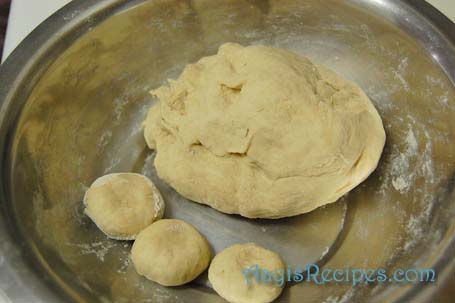
– Puri dough should be harder than chapathi dough . If you make it too soft, they soak up lot of oil. If you make it too hard, you get broken sides. So we measured the ratio of water to flour today. I use Pillsburry chakki fresh atta , which has never failed. But you can use any one of your favorite.
For 1 cup water, we used 2 cups of wheat flour and salt(according to taste). Knead well till you get a uniform dough.
– Immediately after dough is made, roll them into puris . If you keep the dough for a long time before making puris , they soak up lot of oil.
– Do not stack the puris one on top of other. I have seen one of my friend stacks them and keeps touching them and patting them. Please touch/pat a soft toy or a pet if you like patting so much, don’t do it with puris . Again, they soak up oil and don’t puff up when stacked. So, spread them on a paper or a plate.

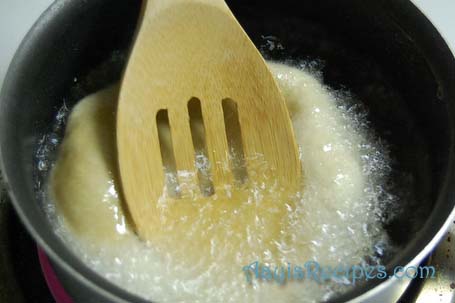
– Heat oil in a pan/ kadai . The oil should be of perfect temperature to get perfect puris . Cut a tiny bit of the dough and put it in oil. If it raises to top immediately, your oil is ready and you can start frying your puris . If smoke is coming out of oil, then that means it is too hot and not suitable for frying.

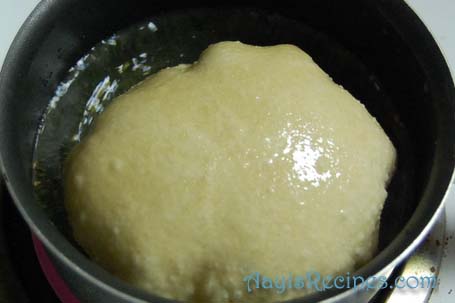
– Slide a puri slowly in hot oil. Some people hold the puris for a long time in hand, please stop doing that, as soon as you lift, please slide them in oil. If it rises to top immediately, oil is on correct temperature.

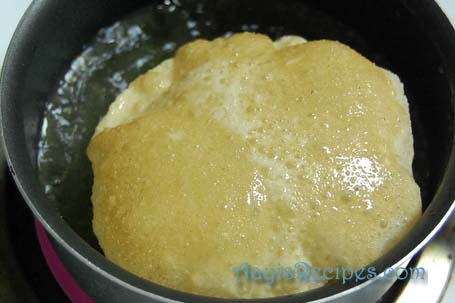
– Now press the puri slightly with a spoon. This helps them in puffing up.
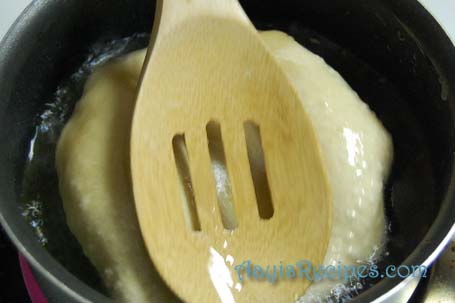
– Turn them upside down and fry from other side. (In the whole process of frying puris , if some of them become dark too soon, you will know temperature is too high. Keep adjusting temperature. You might fail for once or twice, but with practice, they come out perfect. I have had my share of failures before, each failure taught me something new).
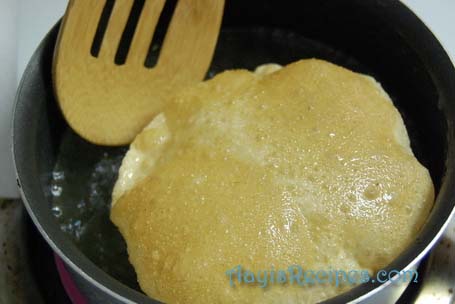
– Take out the puri , hold it in the spoon for sometime allowing as much oil fall back into the pan. Then keep them on paper towel.

– Serve immediately.
Some more tips to avoid unnecessary usage of gas/electricity: When you have rolled 4-5 puris , keep oil for heating. While you finish few more, the oil comes to perfect temperature. Try to keep the heat on medium flame to avoid burning of oil unnecessarily. When you are not frying, bring the heat to low.
To avoid a wastage of oil: It is not good for health to use the same oil again and again for frying. So when you take oil for frying, take it in a smallest available. Smallest because, you can pour only a little oil, this is ideal for people with small families.
PS: One very important point Manisha mentioned today is, do not use any non stick pan for deep frying. It is not good for health. When they are used for extended time on high temperature, they give off poisonous gases. In my case, all I have at hand here with me is one non stick set of pans which I use for everything. But I will surely go for a traditional kadai soon.
